About Bitmap Image
/
0 Comments
It's almost impossible to discuss graphics software without first establishing an understanding of the differences between the two major 2D graphic types: bitmap and vector images. This is an important lesson and often a tough one to grasp. If you work with graphics at all, it's bound to come up, so it's an important concept to understand. Let's start by talking about the more common type: bitmap images.
original size
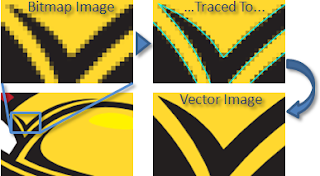
A Bitmap Image--shown zoomed in with the original size in the upper right corner. Notice the individual pixels that make up the image.
Facts About Bitmap Images
Bitmap images (also known as raster images) are made up of pixels in a grid. Pixels are picture elements; tiny dots of individual color that make up what you see on your screen. All these tiny dots of color come together to form the images you see. Most computer monitors display approximately 70 to 100 pixels per inch--the actual number depends on your monitor and screen settings.
To illustrate this, let's take a look at a typical desktop icon such as the one shown in the image here. The icons on your desktop are typically 32 by 32 pixels. In other words, there are 32 dots of color going in each direction. When combined, these tiny dots form an image. The icon shown in the upper right corner of this example is a typical desktop icon at screen resolution. As you can see, when you enlarge the icon, as I have in this example, you can clearly see each individual square dot of color. Note the that white areas of the background are still individual pixels, even though they appear to be one solid color.
Bitmap images are resolution dependent. Resolution refers to the number of pixels in an image and is usually stated as dpi (dots per inch) or ppi (pixels per inch). Bitmap images are displayed on your computer screen at screen resolution: approximately 100 ppi. However, when printing bitmaps, your printer needs much more image data than a monitor. In order to render a bitmap image accurately, the typical desktop printer needs 150-300 ppi. If you've ever wondered why your 300 dpi scanned image appears so much larger on your monitor, this is why. For more in-depth information about resolution, scanning, and printing bitmap images, refer to my article Getting Started Scanning.
Because bitmaps are resolution dependent, it's difficult to increase or decrease their size without sacrificing a degree of image quality. When you reduce the size of a bitmap image through your software's resample or resize command, you must throw away pixels. When you increase the size of a bitmap image through your software's resample or resize command, the software has to create new pixels. When creating pixels, the software must estimate the color values of the new pixels based on the surrounding pixels. This process is calledinterpolation.
Did you notice in the paragraph above, I specifically talked about resizing images "through your software's resample or resize command"? I want to make the distinction between this method of resizing versus zooming in and out, or dragging the edges of your images in a page layout program to resize it. This type of resizing is more accurately called scaling. Scaling an image does not effect the image permanently. In other words, it does not change the number of pixels in the image. However, if you scale a bitmap image to a larger size in your page layout software, you are going to see a definite jagged appearance. Even if you don't see it on your screen, it will be very apparent in the printed image. Scaling a bitmap image to a smaller size doesn't have any effect; in fact, when you do this you are effectively increasing the ppi of the image so that it will print clearer.
Common bitmap formats include:
• BMP
• GIF
• JPEG, JPG
• PNG
• PCX
• TIFF
• PSD (Adobe Photoshop)
• BMP
• GIF
• JPEG, JPG
• PNG
• PCX
• TIFF
• PSD (Adobe Photoshop)
Popular bitmap editing programs are:
• Microsoft Paint
• Adobe Photoshop
• Corel Photo-Paint
• Corel Paint Shop Pro
• The GIMP
• Microsoft Paint
• Adobe Photoshop
• Corel Photo-Paint
• Corel Paint Shop Pro
• The GIMP
All scanned images are bitmaps, and all images from digital cameras are bitmaps.
Converting between bitmap formats is generally as simple as opening the image to be converted and using your software's Save As... command to save it in any other bitmap format supported by your software.
Bitmap images in general do not inherently support transparency. A couple of specific formats--namely GIF and PNG--support transparency. In addition, most image editing programs support transparency, but only when the image is saved in the software program's native format. A common misconception is that the transparent areas in an image will remain transparent when an image is saved to another format or copied and pasted into another program. That just doesn't work; however, there are techniques for hiding or blocking out areas in a bitmap that you intend to use in other software. For more information about retaining transparency in bitmap images, see Transparency from Here to There.
Key Points About Bitmap Images:
• pixels in a grid
• resolution dependent
• resizing reduces quality
• easily converted
• restricted to rectangle
• minimal support for transparency
Page 2: About Vector Images• pixels in a grid
• resolution dependent
• resizing reduces quality
• easily converted
• restricted to rectangle
• minimal support for transparency


