
Simple Zipper Text Effect – Part 2
/
0 Comments
Simple Zipper Text Effect – Part 2
Simple Zipper Text Effect – Part 2
This is Part 2 of this tutorial. In Part 1 we created the zipper brush, stroked the main text, and styled the zipper.
In this part, we’re going to continue styling the other parts, then add the slider (and pull tab) and style them as well.
The Final Result:

Notes:
* the software used in this tutorial is Adobe Photoshop CS6, but you can use CS3+ versions as well.
* you might want to check the Basix Page to see some useful topics on dealing with Photoshop basics, such as loading palettes and some shortcuts.
* you might want to check the Basix Page to see some useful topics on dealing with Photoshop basics, such as loading palettes and some shortcuts.
Resources:
* Rocky wall pattern by Projecteightyfive.
* Small Crosses pattern by Ian Dmitry.
* Diamonds Are Forever pattern by Tom Neal.
* Carbon fibre pattern by Atle Mo.
* Diagonal Noise pattern by Christopher Burton.
* Rocky wall pattern by Projecteightyfive.
* Small Crosses pattern by Ian Dmitry.
* Diamonds Are Forever pattern by Tom Neal.
* Carbon fibre pattern by Atle Mo.
* Diagonal Noise pattern by Christopher Burton.
Note: You might need to load the Contours used in the tutorial, so check this image to see how to do so.
Final result of Part 1

Next, we’ll be applying Layer Styles to the different stroke layers from top to bottom, starting with the layer “20″.
Step 8
Double click the “20″ layer to apply the following Layer Style:
- Bevel and Emboss: Just use the default values.

- Texture: Choose the “Small crosses” Pattern, change the Scale to 50%, and the Depth to 1000%.
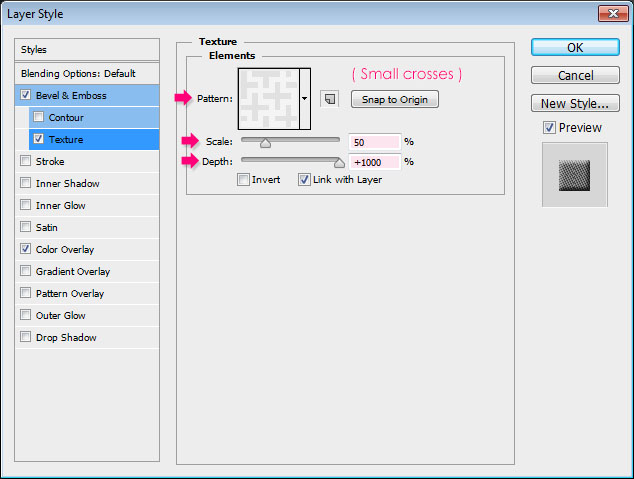
- Color Overlay: Change the color to #696969.
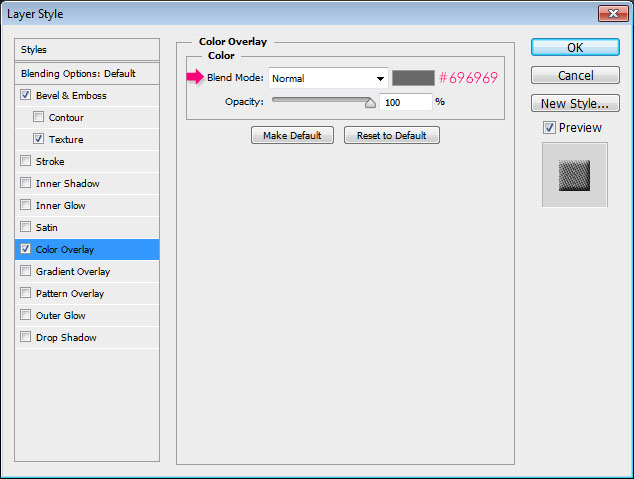
This will style the thin line in the center.

Step 9
Double click the “40 copy” layer to apply the following Layer Style:
- Bevel and Emboss: Change the Size to 1, uncheck the Use Global Light box, change the Angle to -32, the Altitude to 42, check the Anti-aliased box, and change the Highlight Mode Opacity to 20%.
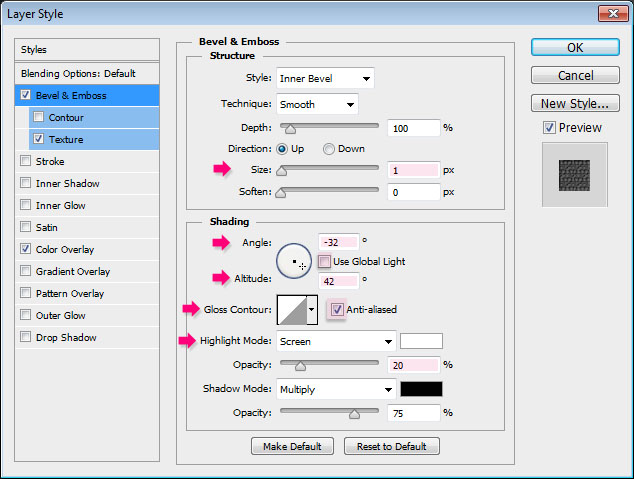
- Texture: Choose the “Diamonds Are Forever” Pattern, and change the Depth to 1000%.

- Color Overlay: Change the color to #494949.
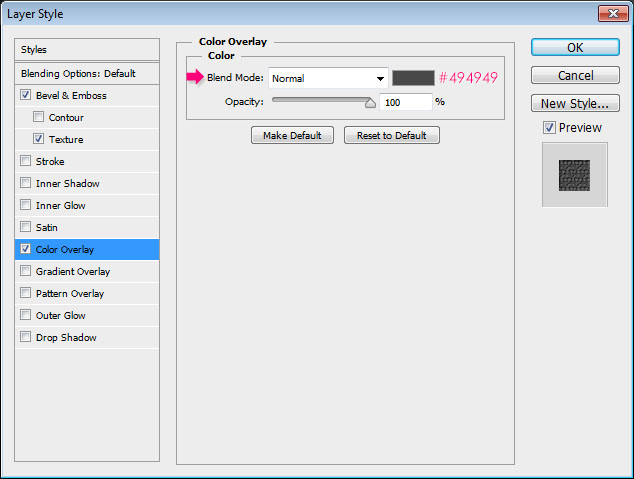
This will style the “Tape”.

Step 10
Double click the “40″ layer to apply the following Layer Style:
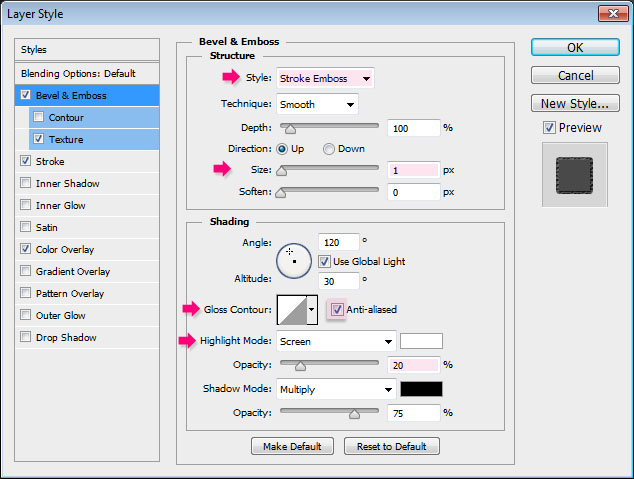
- Bevel and Emboss: Change the Style to Stroke Emboss, the Size to 1, check the Anti-aliased box, and change the Highlight Mode Opacity to 20%.
You’ll see the effect of this step when we apply the Stroke effect next.
- Texture: Choose the “Diamonds Are Forever” Pattern, and change the Depth to 1000%.

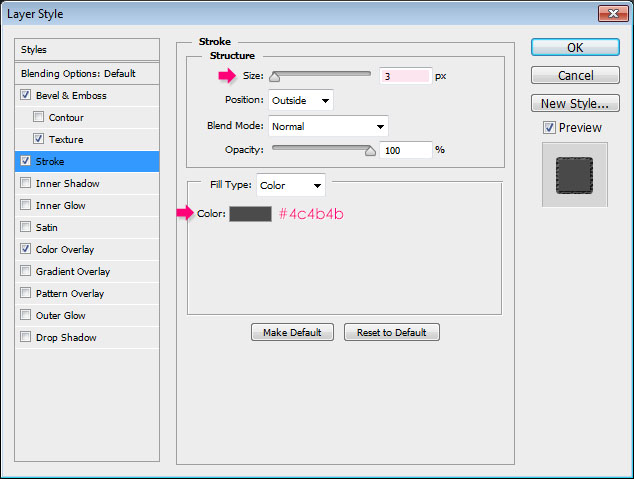
- Stroke: Change the Size to 3, and the color to #4c4b4b.
- Color Overlay: Change the color to #494949.
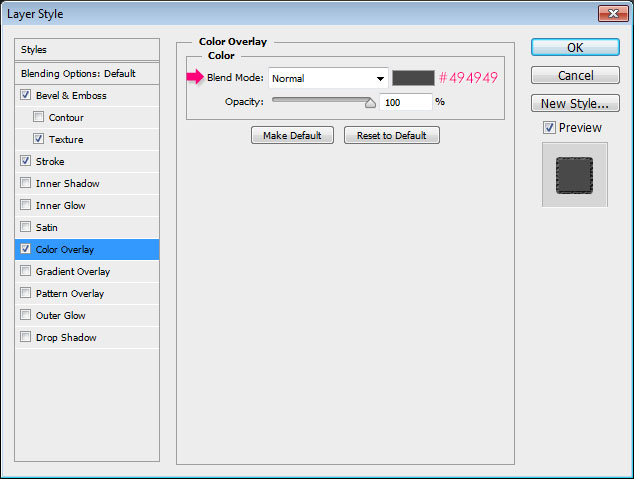
This will add an outer stroke to the Tape.

Step 11
Double click the “70″ layer to apply the following Layer Style:
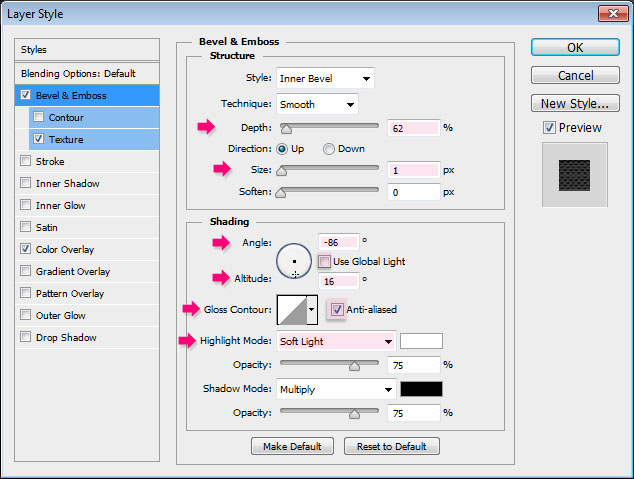
- Bevel and Emboss: Change the Depth to 62, the Size to 1, uncheck the Use Global Light box, change the Angle to -86, the Altitude to 16, check the Anti-aliased box, and change the Highlight Mode to Soft Light.
- Texture: Choose the “Carbon Fiber” Pattern, change the Scale to 50%, and the Depth to 1000%.

- Color Overlay: Change the color to #303030.

This will style the layer around the Tape.

Step 12
Double click the “75″ layer to apply the following Layer Style:
- Bevel and Emboss: Just use the default values.

- Texture: Choose the “Small crosses” Pattern, change the Scale to 50%, the Depth to 1000%.
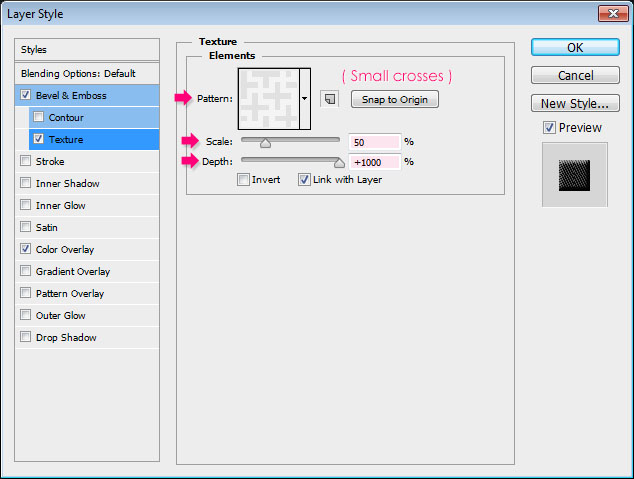
- Color Overlay: Change the color to #0c0c0c.
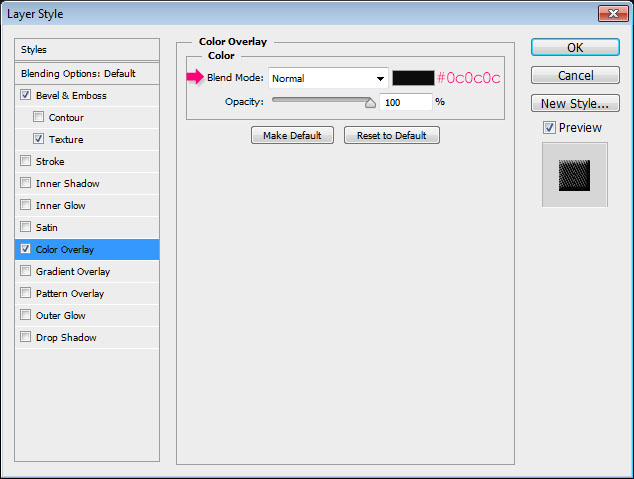
This will style the outer part of the previous layer.

- Ctrl + Click the “70″ layer thumbnail to create a selection.

- Make sure that the “75″ layer is the selected (active) layer, then press the Delete key on the keyboard to delete the selected part. Go to Select -> Deselect (Ctrl + D) to get rid of the selection. This will keep only the outer part of the stroke.

Step 13
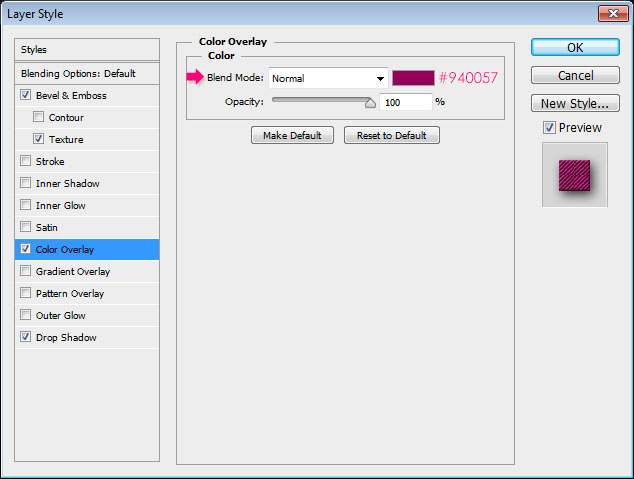
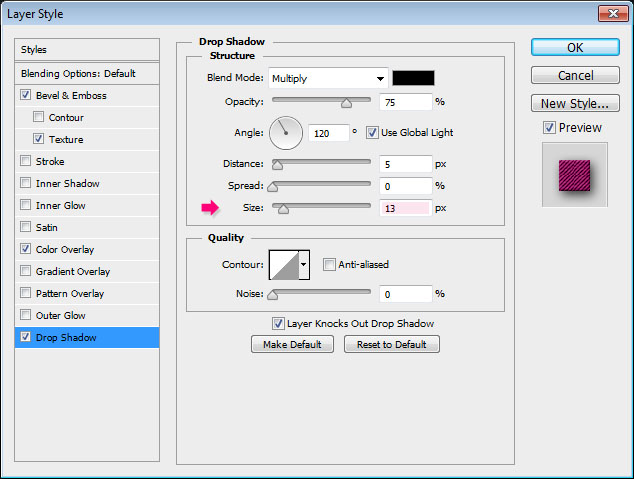
Double click the “100″ layer to apply the following Layer Style:
- Bevel and Emboss: Change the Size to 1, and the Highlight Mode Opacity to 35%.
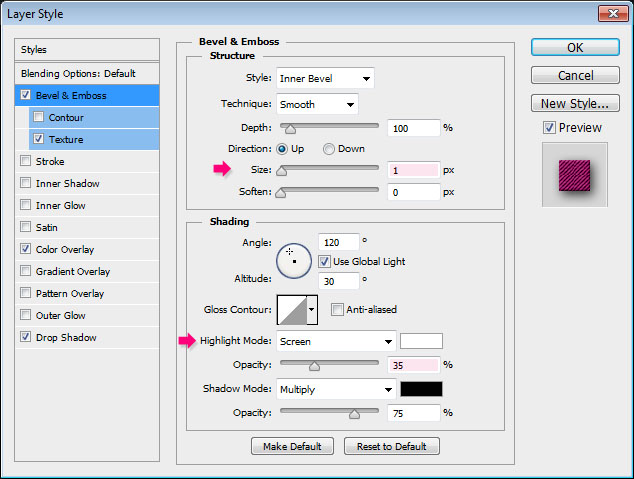
- Texture: Choose the “Diagonal Noise” Pattern, and change the Depth to 1000%.
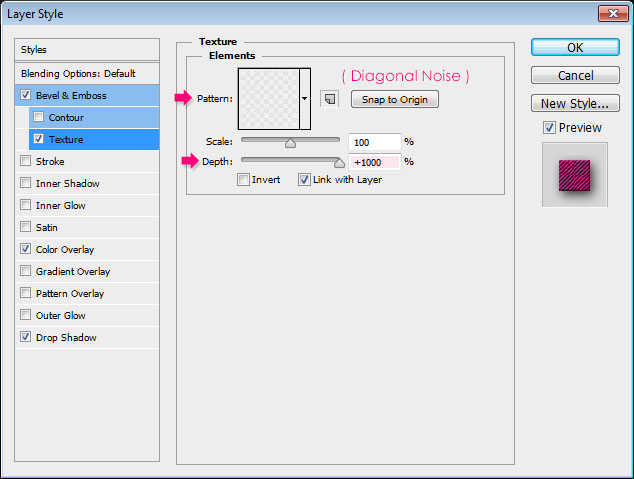
- Color Overlay: This is the fun part where you can try different colors and choose your favorite. Here, the color used is #940057.
- Drop Shadow: Just change the Size to 13.
And the text is all styled now!

Step 14
- As mentioned in the first part, the zipper pieces might overlap. So we tried to fix that, but you might still end up with some empty areas.
You can delete more parts and re add them, but we’re going for an easier option here, which is adding a rivet.
So create a new layer on top of all layers, call it “Rivet”, then set the Foreground color to #838383, pick a hard round brush, choose a size that covers the area, here it is 10 px, then click to add the rivet.

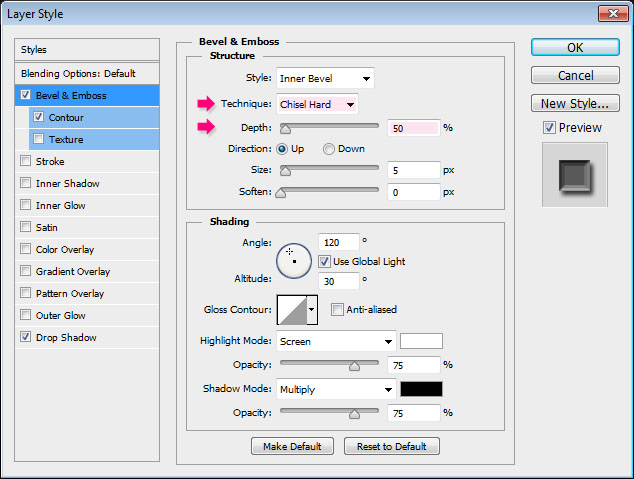
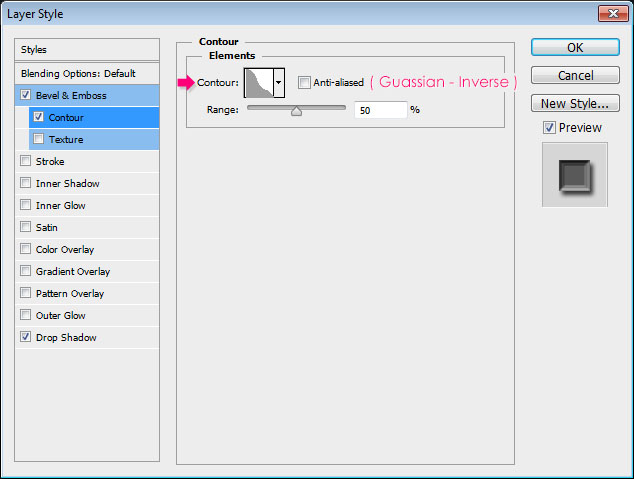
Double click the “Rivet” layer to apply the following Layer Style:
- Bevel and Emboss: Change the Technique to Chisel Hard and the Depth to 50.
- Contour: Choose the Guassian – Inverse contour.
- Drop Shadow: Use the default values.

This will style the rivet.

Step 15
- Next, we’re going to create the slider.
Create a new 350 x 350 px document, set the Foreground color to #969696, pick the Ellipse Tool, then click and drag to create a 150 x 150 px circle (press and hold the Shift key while dragging to achieve a perfect circle).

- Use the Direct Selection Tool to select the anchor point at the bottom of the circle, then go to Edit -> Transform -> Scale. Press and hold the Alt/Option key, then click and drag one side of the transform box inwards to narrow that part down.
Hit Enter/Return when done, and move the point downwards.
Then Select the two points on the sides of the circle and move them upwards.

- Continue modifying the shape until you get a slider body shape that you like. (Something close to a guitar pick shape ^_^).

- Pick the Rounded Rectangle Tool, make sure that the Radius value is set to 5 in the Options bar, then draw a rectangle as shown below.

- Draw yet another bigger rectangle on top of the lower third of the slider.
Then, pick the Ellipse Tool again, and choose the Combine Shape option (icon) in the Options bar. Create an ellipse at the end of the big rectangle.
With the Ellipse Tool still active, choose the Subtract Front Shape option, and create a smaller ellipse inside of the existing one to remove the inner part.

- Finally, pick the Rounded Rectangle Tool, keep the Subtract Front Shape option, then draw a rectangle inside the big one to remove the inner part as well.
You can use the Direct Selection Tool to move the points around if needed.

Next, we’ll apply Layer Styles to the different shapes from bottom to top.
Step 16
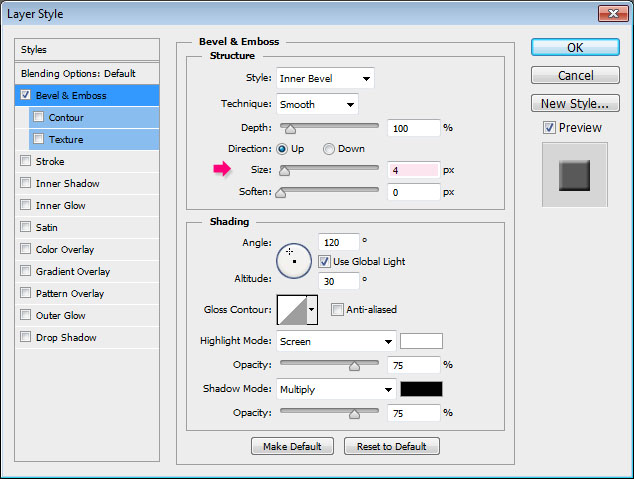
- Double click the main slider body layer to apply a Bevel and Emboss effect, by changing the Size to 4.

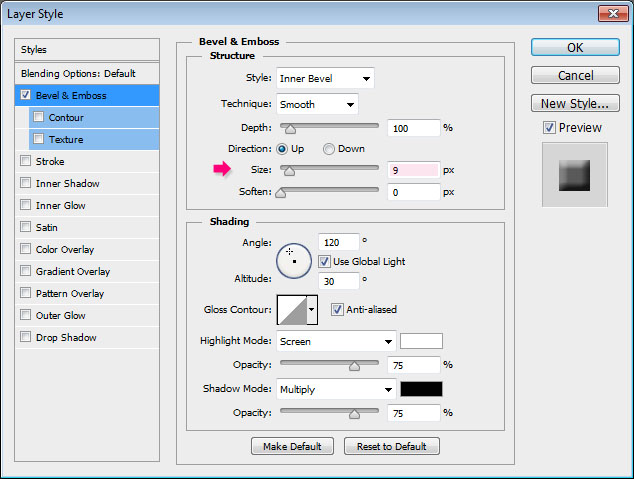
- Double click the small rectangle layer to apply a Bevel and Emboss effect, by changing the Size to 9.

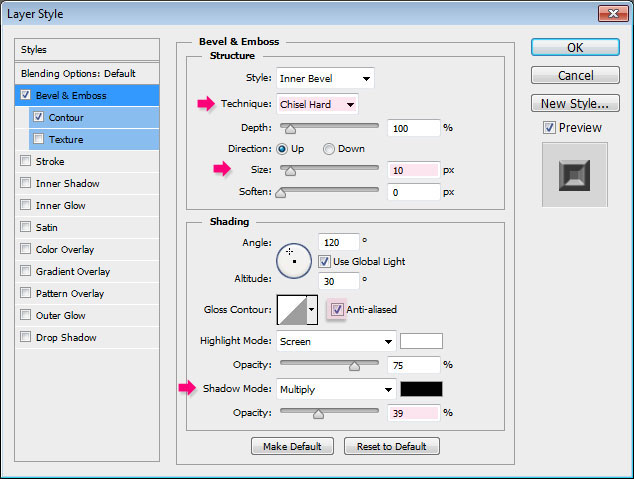
- Double click the last shape (tab) layer to apply the following Layer Style:
- Bevel and Emboss: Change the Technique to Chisel Hard, the Size to 10, and the Shadow Mode Opacity to 39%, and check the Anti-aliased box.
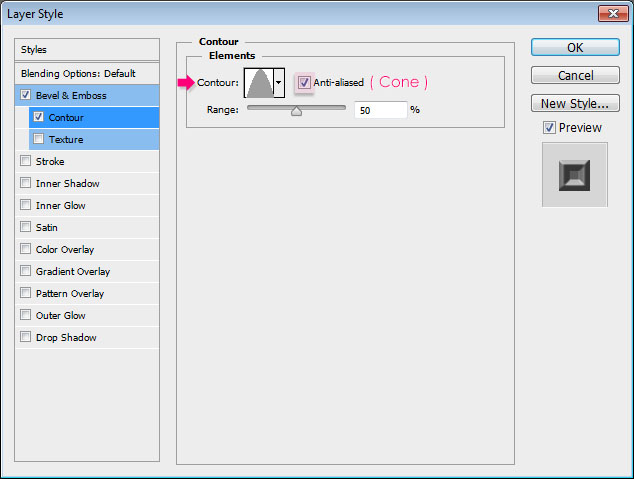
- Contour: Choose the Cone contour and check the Anti-aliased box.
That’s it for the styling for now.

Step 17
- Select all the shape layers you have, then go to Layer -> Duplicate Layers, and choose the name of your original document from the Document drop down menu (under Destination).
Save this document, then close it and go back to the original one.

- Make sure that the duplicated layers are on top of all other layers. Then select each shape layer separately and go to Layer -> Rasterize -> Layer Style.
* Note: This only works for CS6. If you are using older versions, you’ll need to group each layer, then go to Layer -> Merge Group.
What this does, is it makes the Layer Style a part of the layer itself.
Once all shape layers are resterized, select all of them, then go to Edit -> Free Transform.
Resize, rotate, and position the slider at the end of your text. Don’t forget to hit Enter/Return when done.

Apply the following Layer Style to all shape layers:
- Color Overlay: This is optional, but you can use any color you like. Here, the Blend Mode is Multiply and the color is #e1e1e1 (to darken the slider a little bit).

- Drop Shadow: Use the default values.
That should be it for the slider.

Step 18
- The last thing we’ll add is the bottom stop. So use the Rounded Rectangle Tool to create a small rectangle over the zipper’s start point (the color is #626262).

Double click the layer to apply the following Layer Style:
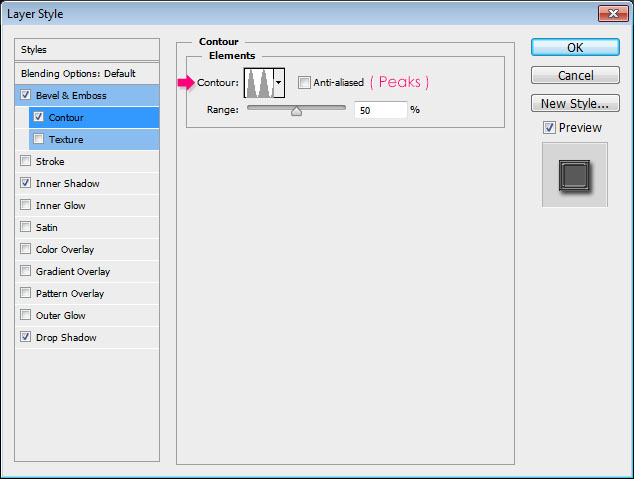
- Bevel and Emboss: Change the Technique to Chisel Hard, the Depth to 150, the Highlight Mode to Vivid Light, its color to #dadada, and the Shadow Mode Opacity to 50%.

- Contour: Choose the Peaks contour.
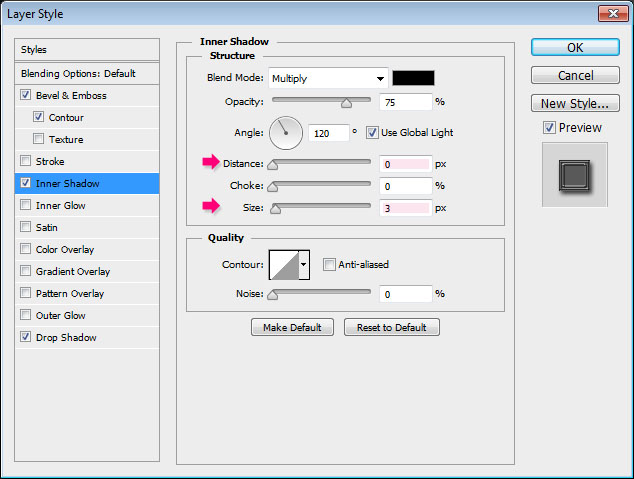
- Inner Shadow: Change the Distance to 0 and the Size to 3.
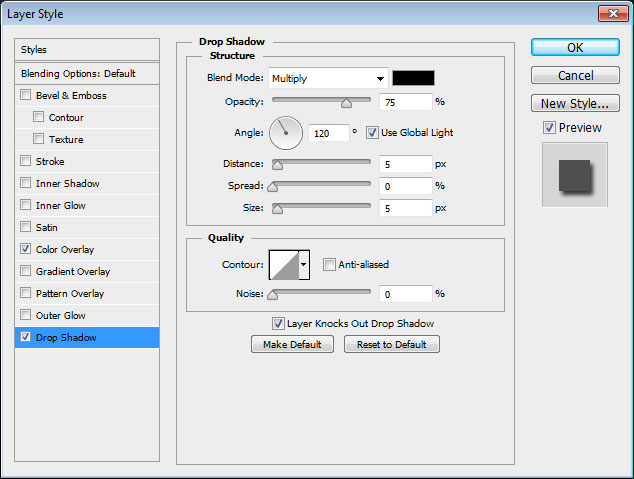
- Drop Shadow: Just change the Distance to 3.

Then, you can move the rectangle to place it as you like.

And we’re done!
Hope you enjoyed the tutorial and found it helpful.
By: textuts


